Wednesday, June 22, 2016

Long days, short years

Recently, I came across a quote by Gretchen Rubin, "The days are long, but the years are short." Gretchen is the author of the book The Happiness Project which has been on my reading list for quite some time.  I've heard mixed reviews from friends/trusted book lovers but when I read this quote, it struck a cord with me, so much so that I might move it to my Amazon cart this week.  

Yesterday, we celebrated a year of living in Dallas, which is why Gretchen's quote is timely and appreciated.  I got in an Uber the other day and the driver said, "So, are you from Dallas?"  I hesitated for a second before answering yes. I went on to say that I moved here last year after spending my whole life in the Midwest.  Why did I feel the need to quantify how long I've lived here, or where I'm from? I think it's because in so many ways, as Gretchen stated, the years are so so short and I can hardly believe we've lived in Texas for a year already. While years seem to be flying by, as I reflect on this past year I'm happy to remember that we've had countless long days filled with spelunking through Dallas, BBQ's, lazy days at the pool, margaritas, epic sunsets and oh so many TACOS.  



I thought I knew tacos before I moved to Texas.  When we lived in Chicago, one of the culinary capitals of the US (or at least I think so), we lived near an incredible taco joint called Big Star.  Their logo is literally the Texas five-point star.  Big Star's patio was packed every day of the week with people drinking salty margaritas, Lone Stars and devouring tacos. So when we moved to Texas I figured that tacos would be like that, just like Big Star.  When meeting new people, one of my go-to questions was always to ask their recommendations for tacos. I've learned that Dallas is filled with places serving either traditional Mexican, Tex-Mex, or fancy tacos (aka tacos stuffed with chicken and waffles or shrimp and grits). I had some of the best Mexican street tacos at a place under a freeway and attached to a gas station. It came highly recommended and didn't disappoint. For my birthday, D gave me a Mexican taco cooking class where we learned how to make homemade tortillas and cut a tomato so that all the seeds are removed (life-changing). After a year of eating tacos on almost a weekly basis, this class gave me some new tips and tricks so I could keep perfecting my taco making skills in my own kitchen. 

On a recent trip with my family, my sister asked me "If you could choose one dinner to eat for the rest of your life what would it be?"  My answer - tacos.  A year ago I probably would have said grilled pizza or a big salad, but after a year in Texas, it's tacos. One of my favorites, hands down, is a fish taco.  I like it grilled with tons of slaw, pickled onions and a chipotle sauce.  So when this recipe popped up on one of my favorite blogs, Sprouted Kitchen, I added it to my list of recipes on Pocket.  


A few notes before getting started:

Fish:
Fresh fish is highly recommended for fish tacos, but frozen fish works great too. For this recipe, I bought fresh steel head trout but Sarah said a firm white fish or salmon works great.  Sidenote: if you're interested in learning about how to buy frozen fish, take a looky here.  

Slaw:
A giant head of cabbage from our CSA had been sitting patiently in our fridge so I used just cabbage in the slaw and loved the result.  Luckily I had leftovers of the nutty/spicy dressing that I've been throwing on salads for work lunches.  

Tortillas!
D and I came very close to buying a tortilla press after our cooking class, but knowing myself, I knew it would soon collect dust in our cabinets. I gained an incredible appreciation for those who make tortillas on a regular basis, it's an art. I use flour tortillas at home just because I've had too many bad experiences with weak corn tortillas falling apart mid bite.

Fish Tacos with Creamy Slaw and Chickpeas (from Sprouted Kitchen)

1 15 oz can of cooked garbanzo beans, drained and dried
1 Tbsp olive oil
1 tsp chili powder
1/2 tsp cumin 
sea salt

2 lbs of firm, white fish or salmon
2 Tbsp of olive oil
2 Tbsp taco seasoning

1/2 of a large cabbage 
4 green onions

1 clove garlic
1/4 cup toasted pepitas
1 tsp capers
1 jalapeno, seeded
1 bunch of cilantro
juice of two limes
2 tsp rice vinegar
2 tsp agave nectar
2-3 Tbsp mayonnaise
1/3 cup olive oil
1/2 tsp each of salt and fresh ground pepper
Tortillas (corn or flour)
Feta Cheese
Avocados for topping

Preheat oven to 400 degrees and put parchment paper on a lined baking sheet. Pour beans onto sheet and toss with olive oil, chili powder, cumin and a sprinkle of salt.  Bake for 15-20 minutes or until crispy. Set aside.


Place fish in a baking dish and spread oil on both sides.  Sprinkle taco seasoning and rub into the fish. Set aside.


Put garlic, pepitas, capers, and jalapeno in a food processor/blender and blend for 30 seconds or so. Then add the cilantro, lime juice, agave syrup, mayo, oil and salt and pepper and blend for 15 seconds. Dressing should be thick but still able to pour off a spoon. If still too thick, you can add a tsp of water or oil until you get the desired consistency.


Chop the cabbage thin - you should have about 4 cups. Slice the green onions and add to the cabbage. Toss with dressing (you might not need all the dressing). 

Preheat grill or pan on stove to medium heat.  Grill the fish for 5 minutes per side. You can also heat your tortillas on the grill or stove, if you like!

Assemble tacos with a piece of fish, slaw, crunch garbanzo beans, crumbled feta cheese and avocado.


Tuesday, February 9, 2016

Meals at your doorstep

A friend of mine gifted me a free week of Blue Apron meals not too long ago.  In case you're not familiar, their service delivers the exact amount of ingredients you need to make delicious recipes throughout the week.  Their slogan is "Blue Apron Makes Cooking Fun & Easy." Services like this come and go and I assumed that Blue Apron was a sham with low quality ingredients made for people who were too lazy to shop and cook.  I stand here today to say that I am wrong.  I've found myself in a cooking rut recently where I come home after work/yoga/spinning and stare at the fridge like a meal will miraculously appear.  Thanks to Blue Apron, in this case it did and I really enjoyed it!

After signing up, they let you pick the meals based upon your dietary restrictions and then they magically arrive on your doorstep in a cooler on the day of your choosing.  We chose the plan which sent us three meals - shrimp, chicken and veggie based - and they arrived in one box with ice packs and recipes cards for each meal.  It was fun to open the box of goodies which were perfectly measured and labeled.  The first meal we made was Shrimp Pineapple Fried Rice.


The instructions were easy to follow and the recipe required chopping a few things like the carrot, scallions, and garlic. I let the rice boil while I sauteed the veggies with the shrimp and pineapple.  


Once the shrimp was opaque and the veggies were soft, I added the soy sauce and Salbal Oelek and sauteed until the sauce thickened. Then the recipe called to add the rice and it made the meal seem more like a stir fry than a fried rice.  While the meal was delicious, the rice wasn't as crispy as I anticipated.


I will say that this recipe was definitely the one with the least amount of effort involved. The other two recipes required much more chopping and multiple pots and pans.  A friend and I were talking about it and we decided that Blue Apron is great for people who love to cook and try new recipes.  If you don't like knives, the act of chopping or waiting for 30 minutes or more for your meal, then Blue Apron is not for you.  Also, part of it felt wasteful since as you'll see in my picture, everything comes packaged in individual bags or containers. On the flip side, if you don't like to shop and buy a package of twelve carrots, a pound of cashews, and the spicy sauce Salbal Oelek, then it's perfect since you won't have these extra ingredients sitting in your fridge or pantry for eons. 

Blue Apron's service is fantastic and while I am not sure we'll continue it (because I love to grocery shop and pick my own recipes), I can see why people rave about it. Cooking is cooking and regardless of how your ingredients make their way into your kitchen, meals deserve to be enjoyed!  Sidenote: we've given a week of meals as gifts for weddings, new houses, and holidays and gotten yummy reviews.  Highly recommend if you're looking for a gift idea! 


Monday, December 21, 2015

Buying love with cookies

'Tis the season for chocolate, mulled wine, pine-smelling goodies, and holiday-themed sweaters!  I come to you today with a simple cookie recipe: Salted Chocolate Chunk Cookies.  I started making them this summer during my fun-employment and D and I ate a couple dozen in two days.  I brought them to a 4th of July BBQ and they vanished by the end of the night. A few weeks into my new job, I brought them to a potluck lunch and once again they were a hit.  In fact, they were loved so much that last week my boss asked me at our holiday lunch if I had made them and when I said I had brought gingerbread cake instead, she stomped her foot with displeasure. Wow! These cookies are getting in people's heads. 

These past few weeks we've had a handful of holiday parties with co-workers and friends and I feel lucky to be able spread cheer with these magic cookies.  In a new city the holidays can feel foreign and if it weren't for the people we've met who now consider us family, I don't know where we would be - oh wait, probably eating cookies on the couch by ourselves.  As we close out this year, I feel thankful for the friends, new and old, who help keep me sane, and for family who we will either be with in person or in spirit.  May your holidays be warm, bright and full of cookies!


Salted Chocolate Chunk Cookies (via Smitten Kitchen via Not Without Salt)

Yield: 18 - 24 cookies

1/2 cup unsalted butter, at room temperature
2 tablespoons granulated sugar
2 tablespoons turbinado sugar (I usually use brown sugar instead)
3/4 cup plus 2 tablespoons packed brown sugar (I leave out the 2 tablespoons)
1 large egg
1 teaspoon vanilla extract
34 teaspoon baking soda
1/4 teaspoon fine sea or table salt
1 3/4 cups all-purpose flour
1/2 pound semi- or bittersweet chocolate cut into 1/2-inch chunks with a serrated knife (I cheat and use the Trader Joe's semi-sweet chocolate chunks)
Flaky sea salt, to finish

Heat oven to 360 degrees F (yes 360, not 350!) and line baking sheet with parchment paper. 

In a large bowl, cream together the butter and sugars with an electric mixer until light and fluffy, roughly 5 minutes.  Add egg and vanilla, beating until incorporated, and scraping down the bowl as needed.  Beat in sea salt (not the flaky salt) and baking soda until combined.  Then slowly add flour and mix until combined.  The dough will look crumbly at this point - that's ok.  With a silicone spatula, add the chocolate chunks.  If the dough is still too crumbly, then add a tablespoon of cold water.

Scoop cookies into 1 1/2 tablespoon mounds, spacing them apart on the prepared baking sheet. Sprinkle each with a few flakes of sea salt.  Bake for 11 or 12 minutes, until golden on the outside but still very gooey and soft inside.  Once out of the oven, let them rest on the baking sheet for 5 minutes before transferring to a cooling rack.

Insider tip - I like to make a double batch and I form half the batter into scoops and then freeze them on a baking sheet until solid.  I've baked these right from the freezer when having people over or just wanting a couple for D and I to have when the craving hits!


Wednesday, November 11, 2015

Glints of red in a sea of green

Last week I spotted four trees, lined up a row, and their leaves were turning a beautiful shade of red.  I was walking Parker early before work and I looked around the street to see if anyone else noticed what I had.  Parker and I walked, he kind of pranced as corgis do, over to the other side of the street and I stood and stared at the ruby-colored trees.  Could it be?  I quickly snap-chatted a picture to a few friends and captioned it "I found fall in Dallas."  I wish I had saved the picture as proof. A friend of mine in Dallas replied, "Welcome to fall in the South." A few days later, I called my brother, who has lived in Texas and California for the last 9 years, and we talked about how weird it is to live in a place where the leaves barely change and the temps are in the 70's in November. He told me the payoff would be worth it in the winter.  

The last few days have felt more like fall.  There's a chill in the air and it smells different outside.  You know that smell of leaves, football, Oktoberfest beer and sunshine? This past weekend I went to a Beer fest and drank my fair share of Oktoberfest and Stout beer.  As the sun went down, I put on my jacket and thought to myself, I'm chilly! I pulled out my phone to check the temperature and it was 55 degrees. 55 DEGREES people.  My former midwestern-living self would have killed for a 55 degree night.  While I was tougher when it came to wind and cold in Chicago, I've learned to acclimate to the heat here and I'm ok with waiting longer for Fall.  In the past four months I've experienced more change in my life between moving, securing a new job (!!!), meeting new friends and exploring a different part of the country.  Because of this, I'm ok with the lack of change of seasons. 

Big Bend National Park

In my kitchen, I had been holding on strong to heirloom tomatoes, corn, and stone fruits.  As those disappeared from the grocery store I started to buy more squash, sweet potatoes, figs and grains.  Apparently my stomach has big plans for making tons of squash as I came home from the store the other day with acorn AND delicata AND spaghetti squash - but the good thing is, these goods keeps forever.  For dinner that night, I hacked (literally) into an acorn squash and filled it with a quinoa situation.  Using a Food & Wine recipe as a guide, I roasted the squash, boiled quinoa, threw in some goodies, whipped up a dressing and in under an hour I had created quite the autumn-themed acorn squash boat.  Wherever you live, this recipe is sure to put you into an autumn state of mind.  Now, if I can just learn to grasp that Thanksgiving is in two weeks since I'm hosting it for the first time. I better get to menu planning!


Acorn Squash Boats - Adapted slightly from Food & Wine

1 Acorn Squash, halved (could use Delicata, if you prefer)
2 tablespoons olive oil
1 tablespoon maple syrup
Salt and freshly ground pepper
1 cup quinoa
2 cups water
2 tablespoons apricots, chopped
1 tablespoon apple cider vinegar
1 teaspoon honey
1 apple (any kind), diced
1 large shallot, minced
1 garlic clove, minced
1/4 cup pecans, chopped


1. Preheat the oven to 350.  Brush the cut sides of squash with the 1 tablespoon of olive oil and season the cavities with salt and pepper. Place the squash cut side down on a baking sheet and roast for 45 minutes, until tender. When they are soft, remove from oven and brush with 1 tablespoon of maple syrup.


2. Meanwhile, in a saucepan place 1 cup quinoa and 2 cups of water and bring to boil.  Once boiling, turn the heat down to a simmer and cover for 10 minutes. Stir in the apricots and simmer another 5 minutes.  Transfer quinoa to a large bowl and let it cool.

3. In a small dish whisk the vinegar, honey and remaining tablespoon of olive oil and season with salt and pepper.  Add the dressing to the quinoa with the apple, pecans, shallot and garlic and toss well.

4.  Set the squash halves on plates. Fill with the quinoa salad and serve. Happy Fall!


Wednesday, August 12, 2015

Bikinis & Galettes

The other night I checked the temperature at 10:00pm and it was 92 degrees.  When friends ask "How hot is Dallas?" I usually respond with, "It's really hot, but honestly, it doesn't bother me." My coping mechanism is this: anytime I get into a swelteringly hot car and the temperature reads 112, I remember how I felt in Chicago in the winter and I immediately feel better. It's my new favorite thing.

But let's face the reality, we live in a place that is basically a sauna 24/7, so I've taken on a new hobby - swimming! I found a swimming pool and it's the perfect escape in this southern heat. The first day I showed up with my Target bikini and swim goggles and I think I only swam 4 laps of breast stroke. I was exhausted and totally enamored with the other swimmers who had sporty swimsuits, goggles, swim caps, pull buoys and flippers.  In addition to cool accessories, they all seemed at ease in the water. I left with a new appreciation and also a mission for my summer - learn how to swim a mile in this pool.   First things first, I bought a good swimsuit, so that I didn't risk accidentally exposing myself to my lap neighbor, and since then I've been building up stamina with each trip to the pool.  

Swimming is hard, and each time I leave the pool, I feel very proud of what I accomplished. Do you want to know what else is hard in my world? Finding the right job in this new crazy place. The other night over dinner, D and I talked about my job search and how many ups and downs I've experienced over the past few months. I've had a combination of great, ok and terrible interviews and learned a lot about myself throughout the process. Each day I still chug along by applying to jobs, meeting a new contact for lunch/coffee (whatever is easiest for them!), or having an interview. I've learned there are a lot of jobs out there, but finding the right one for me and then convincing them I'm the best candidate - is a lot harder than it looks. See, it really is JUST like swimming :)

Today, I'm happy to report, I swam a mile in an OLYMPIC SIZE SWIMMING POOL. It felt incredible. Small victories over here but it felt really good. I should preface, this recipe has nothing to do with swimming or job searches. Whenever I'm having a day that involves endless job board scrolling, I find that cooking something great makes me feel a whole lot better. This recipe for a Burst Tomato Galette just screams summer. You can choose any vegetable you want, really. Also, if you're not keen on making your own dough, a store-bought puff pastry is a yummy alternative. The word 'galette' sounds so fancy but really, it is very simple. You'll notice it has a few ingredients and takes an hour or so of time to pull together and I promise it's worth it. 

Burst Tomato Galette from Smitten Kitchen

The Pastry
1 1/4 cups All-Purpose Flour
1/4 teaspoon salt
8 tablespoons cold unsalted butter, cut into cubes and chilled afterwards
1/4 cup plain yogurt or sour cream
teaspoon fresh lemon juice
1/4 cup ice water


The Filling
1 tablespoon olive oil
1/4 teaspoon table salt
3 cups of cherry tomatoes
1 ear of corn, cut from the cob
1 small zucchini, diced
4 scallions, thinly sliced
1/2 cup grated parmesan cheese

The Glaze 
1 egg yolk with 1 teaspoon of water


I'll default to Smitten Kitchen since she does a great job of laying out the steps.  Follow this link for her instructions.  The galette will keep for a day or two in an air-tight container in the fridge.  I think it's even better the next day!


Friday, July 17, 2015

Miles crossed

I am sitting on my patio and just finished a deliciously sweet and sticky popsicle.  Since my last post, we've moved almost 1,000 miles from Chicago to Dallas.  We said adios to our jobs, celebrated with friends and family, and said "see you later" to the city we called home for 7 years.  While in Chicago, D and I both started and finished graduate school, moved into our first apartment together, got married, made many lifelong friends, attended loads of concerts, ate/drank very well and fell in love with the Windy City. Now that we've moved, I've reflected on the aspects of Chicago that I miss, like our friends, favorite restaurants and views of Lake Michigan.  However, there are other parts that I'm happy I won't have to face anymore like the traffic and long commutes, the bitter cold of winter, and the need to feel like I'm always in a rush to get somewhere.  Dallas is very different than anywhere I've lived and so far I'm loving the heat, the constant sunshine (it's sunny on average 235 days a year here!), and the southern hospitality of strangers.


After living in one place for so long, it's incredible how many things you accumulate. For weeks leading up the move we packed what felt like thousands of boxes, used a ridiculous amount of bubble wrap, and tossed or donated many of our belongings. Somehow we managed to move everything and not one thing broke, which is a total miracle.  We're getting settled in our Dallas home and I'm feeling like a kid in a candy store in our kitchen since it has beautiful granite countertops, new appliances and so much cabinet space!  With all of our kitchen space, I decided it was high-time to purchase something that's been on my list for years: a popsicle mold.  Every summer in Chicago I went to buy a popsicle mold and decided against it since it's really only popsicle weather for two-three months out of the year in the Midwest. Now that we live in a place where the heat is a part of the everyday culture, I knew this kitchen accessory would get plenty of use.

For it's christening, I looked through several popsicle recipes such as strawberry-balsamic-mint, coffee and cream, and toasted coconut, but decided to go with something simple and refreshing. I made the Swirled Berry Yogurt popsicles from The Smitten Kitchen. I fell in love with this recipe because it's easy to make, can be adapted with any berry of your choice and they're also very pretty!  Strawberries are everywhere right now, so I went with these ruby jewels.  


With every bite you will find either berries - which taste like frozen jam - or sweet yogurt.  These are bound to make your summer afternoons and nights delicious.  I've even thought about eating them for breakfast because they're like a frozen smoothie and that constitutes as breakfast, right?

Swirled Berry Yogurt Popsicles

2 cups of berries - if they are large, I recommend lightly chopping them
2 tablespoons honey
1/2 lemon or 1 lime
1/2 cup water
1/2 cup granulated sugar
1 1/2 cup plain unsweetened Greek-style yogurt

Place the berries, honey, and 1 tablespoon of lemon or lime juice in a non-reactive bowl, stir and set aside. Take the peel of the squeezed lemon/lime and put it in a small saucepan with the water and sugar. Cook on low heat and stir until the sugar has dissolved. Remove the citrus peel and chill the syrup completely.  To speed up the chilling process you can place the saucepan in a ice bath - it should cool in 5-10 minutes.  Once cooled, whisk the yogurt and syrup together.


Using a blender or food processor, blend the berries and leftover juices until smooth.  If you want to remove the seeds you can do so with a strainer.  I left them because that seemed like way too much work, it was 95 degrees outside and I needed a popsicle fast.

Assemble the popsicles by alternating the berry and yogurt mixture that you pour in. Repeat this until you reach 1/4 inch from the top of the mold.  This will allow for space when the popsicles freeze and expand.  Use a skewer or knife to swirl the mixture lightly in each popsicle (hint: this makes them pretty!). 


Snap on the popsicle mold lid and place in a freezer for 3-4 hours.  To remove, run the sides under hot water for a few seconds.  Once your popsicle is out, you can bask in the sun while enjoying your frozen jeweled treats.


Friday, March 27, 2015

What's in a name?

I'm a sucker for horoscopes or personality quizzes of any kind. Are you? Since I decided to become a Psychology major in undergrad, against my parent's wishes of becoming a Business major, my love of character quizzes only makes more sense.  This hobby has evolved over time and a recent habit of mine is taking the BuzzFeed quizzes, which my friends and I send each other every Friday. While totally silly, these will make you laugh. Promise.

The other day, one of my favorite blogs featured a post about the meaning of a name.  I immediately lit-up and clicked on the link.  I know my name is German, stemming from my full-name Kristina; however, I didn't know what my name really meant. At last! A chance to see if I was living up to the name my parents chose 30 years ago. After submitting it, I read through the results grasping for any characteristic which remotely resembled me. Some of the conclusions were laughable, "She is a seductive and glamorous woman." HA! I don't think those words have ever been uttered together before. While other aspects were spot on, "She is torn between her concern for others´ needs...her memory is excellent... she will prove herself to be a remarkable hostess...[and she is] understanding, communicative, pleasant and friendly in her interactions with others." Even though this quiz is probably a bunch of BS, I enjoyed being reminded of the characteristics which I sometimes love and/or hate about myself. Here's the quiz, if you would like to take it.  

One of my personality traits that was validated by the quiz is I have a freaky accurate memory -- particularly with faces and names.  This proves to be helpful in my career (graduate school admissions) and with new friends or acquaintances. It's also helpful because this is not one of my husband's strengths.  Picture this: we'll be walking down the street and about to pass one of our neighbors we've met a few times.  I'll give him a quick heads up and whisper his/her name right before we pass them.  We make a good pair. Opposites attract, yes?

Also, I have many recipes stored somewhere in my brain. My favorite: the banana bread recipe from A Homemade Life. I find myself making this bread whenever I am anxious, nervous or in need of a pick-me-up. It might be because I'm concerned about someone close to me (see personality test results) or thinking about something personal. When I make this recipe, those bad feelings melt away and all is right in the world because I have banana bread. I have the recipe almost memorized, but, I still like to take the book out and turn to the dog-eared page for banana bread.  The book's binding is almost permanently cracked at this page and I love it.

I recommend trying this recipe because while it's a comfort food, the crystallized ginger gives it a fresh and spicy flavor which I hadn't experienced in baked goods before.  The dough is springy and with every bite you'll almost always find a pocket of melted chocolate or spicy ginger. These ingredients compliment banana bread oh so well. Special note -- this bread is best warm. You must try a slice shortly after it comes out of the oven. The next day, try toasting it and adding butter for breakfast or whipped cream for dessert. You can't go wrong. 


Banana Bread with Chocolate and Crystallized Ginger (from A Homemade Life by Molly Wizenberg)

6 tablespoons unsalted butter
2 cups all-purpose flour
3/4 cup sugar
3/4 teaspoon baking soda
1/2 teaspoon salt
3/4 cup semisweet chocolate chips
1/3 cup finely chopped crystallized ginger

2 large eggs*
3 large ripe bananas, mashed
1/4 cup well-stirred whole-milk plain yogurt (not low or nonfat)
1 teaspoon vanilla extract


*You'll notice I have three eggs in the picture below.  My memory failed me and I used three instead of two.  I didn't notice a difference. 


1. Set a rack in the center of the oven, and preheat to 350F. Grease a 9- by 5-inch loaf pan with cooking spray or butter.

2. Melt the butter and set aside to cool slightly.

3. In a large bowl, whisk together the flour, sugar, baking soda, and salt. Add the chocolate chips and crystallized ginger and whisk well to combine. Set aside.


4. In a medium bowl, lightly beat the eggs with a fork. Add the mashed banana, yogurt, melted butter, and vanilla and stir to mix well. Pour the banana mixture into the dry ingredients, and stir gently with a rubber spatula, scraping down the sides as needed, until just combined. Do not overmix. The batter with be thick and somewhat lumpy, just make sure all the flour has been incorporated. Scrape the batter into the loaf pan and smooth the top.

5. Bake into the loaf is a deep shade of golden brown and a toothpick inserted into the center comes out clean, 50 minutes to an hour. If the loaf seems to be browning too quickly, tent with foil.


6. Cool the loaf in the pan on a wire rack for 5 minutes. Then tip out onto the rack, and let it cool completely before slicing. Or, if you're like me, steal a quick slice first. The loaf freezes well wrapped in plastic wrap and again in foil to protect from freezer burn.

Monday, February 23, 2015

I see you, Winter

Winter has finally decided to show up in Chicago, which means chilly days and sub-zero windchill. The pretty blanket of white snow has turned into mountains of black, sharp and dangerous ice. We are still digging/chopping snow to find a place for our car and it's not uncommon to hear tires spinning and people screaming in agony as they try to shove their cars in and out of parking spots. February is usually the month where I find myself questioning why on earth people, like myself, choose to live under such conditions.  Luckily, with a move to a warmer place on the horizon (come on, June!), this winter has been a season of lasts for us and we are oh so excited.  In the meantime, we continue to celebrate the small victories like, "The sun is out!" or "It's still light at 5:30pm!"  

While it might be cold outside, my kitchen this time of year is usually toasty. I use the oven more in the winter to roast, bake or reheat leftovers. My favorite and most simple recipes involve roasting vegetables into oblivion and root vegetables, in particular, are even better the longer you roast them. When it comes to anything vegetable related, I always turn to Yotam Ottolenghi's cookbooks for recipes. I love his writing (he's hilarious) and also the fact that he pairs beautiful vegetables with loud spices and flavors. His cookbook, Plenty, is a staple in my kitchen and I highly recommend adding it to yours, whether you are a vegetarian or not. He moves vegetables from what would normally be considered a side dish to the main course. I first learned about Plenty from my best friend, and we made many a dish together from this cookbook before she moved to Denver a few years ago. One year for Christmas, it arrived on my doorstep from her and I couldn't have been more excited. We both continue to cook from it and send each other pictures of the meals we each have made so we can dog ear recipes to try in the future. One of my personal favorites is the Sweet Potato Cakes.  I'm going to post that recipe sometime very soon. Many of Ottolenghi's recipes involve a long list of ingredients, which can scare people away, but if you look closely a lot of the ingredients are spices and require little effort. For example, before I opened his cookbook, I hadn't heard of harissa, but it is worth the purchase at your local specialty foods store.  

I enjoy making most of his recipes on Sunday afternoons/evenings when I have the time to chop, peel, roast, bake, or what have you. Yesterday was cold and sunny (!!!) so while D was walking Parker, I opened up this cookbook to find inspiration.  I stumbled upon this recipe because of the title, "The Ultimate Winter Couscous," which appeared to be screaming at me when I read it.  For Yotam to be using the word "ultimate" in a recipe, I figured it must be damn good.  After a boozy brunch at Lula Cafe, we stopped at Stanley's Fruit and Vegetables, Chicago's best kept secret for fresh and reasonable produce.  Chicagoans, you must go here if you haven't been yet. But shhhh, you must also keep it a secret before all of Chicago starts to shop there. I usually come home with 3-4 bags of produce each week and it never costs more than $25. One time, I bought 8 lbs of strawberries for $1.99. We had smoothies coming out of our ears. 


When we got home from Stanley's, I proceeded to peel, cut and chop the root veggies and squash, put them into a dutch oven and then watch the Red Carpet at the Oscar's while it roasted and delicious scents started to waft out of the oven. After the vegetables did their thing, I made the couscous and sauteed chicken. You could add any protein you like, or leave it as is. The vegetables are cooked to the point where they still crunch and the spices (paprika, ginger, turmeric, cinnamon, anise, bay leaves, chili flakes) give just enough heat. I bought cilantro and forgot to add it in the end.  It didn't need it, but I would add it just to give the meal even more dimension. This meal is going to become a staple in our house, I can just tell.  We gobbled it up and shortly after watched Lady Gaga's Sound of Music tribute at the Oscar's.  Check out her performance if you missed it, while eating The Ultimate Winter Couscous.  Oh, and buy Plenty! You won't be sorry.

The Ultimate Winter Couscous
From Plenty, by Yotam Ottolenghi
 

2 medium carrots, peeled and cut into 3/4" chunks
2 medium parsnips, peeled and cut into 3/4" chunks
8 shallots, peeled
2 cinnamon sticks
4 star anise
3 bay leaves
5 Tablespoons olive oil
salt
1/2 teaspoons ground ginger
1/4 teaspoons ground turmeric
1/4 teaspoons hot paprika
1/4 teaspoons chili flakes
2 1/2 cups cubed butternut squash
1/2 cups dried apricots, roughly chopped
1 can chickpeas
1 1/2 cups chickpea liquid or water
1 cups couscous
large pinch saffron
1 cup boiling vegetable stock
3 Tablespoons butter, broken into pieces
2 Tablespoons harissa paste
1 oz preserved lemon, finely chopped
2 cups cilantro leaves


Preheat oven to 375 degrees. Place carrots, parsnips, shallots, cinnamon sticks, star anise, bay leaves, 4 T olive oil, 3/4 t salt and all other spices in a large oven proof dish. Mix well and cook for 15 minutes.


Stir in the butternut squash and cook for 35 minutes. Add the apricots, chickpeas and their liquid. Cook for 10 more minutes.

About 15 minutes before the vegetables are done, place the couscous in a heatproof bowl with the remaining 1 T olive oil, saffron and 1/2 t salt. Pour the boiling stock over the couscous and cover the bowl tightly with plastic wrap. Let sit for 10 minutes until all the stock has been absorbed. Fluff and stir in butter with a fork until melted. Cover to keep warm.

Remove the vegetables from the oven and stir in the harissa and preserved lemon. Taste and add more salt if you like.

To serve, spoon couscous into individual bowls, top with vegetables and sprinkle with plenty of cilantro leaves.


Sunday, February 8, 2015

New Year, New You

Happy New Year!  I realize that it's February and we are way past the stage of saying Happy New Year, but this is my first post in awhile. This year has been good to me thus far.  I turned 30 recently and had one hell of a celebration.  I love birthdays more than most people and so the celebration turned into a several week affair.  We celebrated at the Signature Room (bucket list, check!) on the 95th floor of the John Hancock building with my parents, and the following weekend D and my sister threw a cooking inspired surprise party which ended with an epic dance party at one of our favorite bars.  I've been told by news sources that my birthday is technically the "most depressing day of the year" due to the freezing climate, lack of sunlight and the fact that it's a month after the holidays.  Even in the bitter cold of winter as I trudge up and down Wacker Drive, cursing at the wind and snow, I am thankful for a winter birthday to remind me of all those who I love and am thankful for. 

Now as I move past the birthday celebration afterglow, I plan to hibernate my way through winter by continuing to write, cook, check things off my Chicago bucket list, and make more time for new adventures. Recently, a friend and I signed up for a Zumba class (we're the youngest ladies in the class by 20 years) and I'm having more fun than I imagined.  I learned that I'm wayyyy more uncoordinated than I thought and that it's ok to feel awkward in my own body. Also, a coworker, who happens to be an amazing yoga instructor, has started teaching a yoga class at work during lunch and it's a nice break in the middle of my week.  I've almost (!!!) conquered the "crow" position thanks to her and Lo.  New Year, New You, right?

Speaking of trying new things, I've been cooking more simple meals throughout the week to leave more time for reading, watching shows like Downton Abbey, and spending QT with D and Parker.  At first I sort of felt like a cop-out for making such simple meals like quesadillas or fish sticks and corn, but now I feel like my nights are more full, in fact.  I wouldn't say that this was a new year's resolution, instead it's more a pleasant surprise and the result of shifting interests.  Enter another quick meal: One-Pan Pasta. Who knew that you could boil all your pasta ingredients in one pan and that the water/broth turns into a delicious sauce?  Magic!  In talking with friends, I learned that I am late to the game on this one. Well I'm sure glad I found out about this magic. Better late than never, right? 


One-Pan Pasta (from Lottie + Doof via Martha Stewart Living)
12 ounces spaghetti or linguine 
12 ounces cheery tomatoes, halved
1 onion, thinly sliced
6 garlic cloves, sliced
1/2 teaspoon red pepper chili flakes
2 sprigs basil
2-3 tablespoons olive oil
2 teaspoons kosher salt
1/4 teaspoon ground pepper
4 1/2 cups water (or chicken stock)
Plenty of freshly grated parmesan cheese for serving


Combine pasta, tomatoes, onion, garlic, red-pepper flakes, basil, oil, kosher salt, pepper, and water in a large skillet. Bring to a boil over high heat. Boil mixture, stirring and turning pasta frequently with tongs, until pasta is al dente and water has nearly evaporated, about 10-12 minutes.


Season to taste with salt and pepper, divide among bowls, and garnish with basil. Serve with oil and parmesan.


Sunday, November 30, 2014

Friends Make the World Go Round

With Thanksgiving in the rearview mirror, I've spent the last few days reflecting on those things I'm thankful for: good health, family, friends, and corgis. I have family a mere 90 miles away and friends who are more like family that are a phone call or quick plane ride away.  I'm thankful for a loving and supportive spouse who has taught me to live spontaneously and not stress over things that are out of our control.   One of those things is his upcoming fellowship match.  In a few short days, D and I find out where he matched for his cardiology fellowship.  We have our wish list, of course, but in reality we would be happy in any of the fifteen (!!!) places on the list.  As the date approaches, I try to think about what it will be like on the other side, after we find out where we're moving to for the next 3-5 years.  I appreciate the calm before the storm and am trying to soak in this time.  This holiday at home was the perfect escape for me and I slept better and longer than I have in a long time.  Isn't it great how being home can do that? Life seems to slow down in a way that doesn't seem possible in Chicago.  I revert back into my old ways of wearing PJs for most of the day, having spontaneous dance parties with my sister, drinking New Glarus while watching movies and taking long walks with Parker along Lake Michigan.  Time with family is my reset button. 

Last week, before the holiday, I had the chance to see one of those people who falls into the "friends who are more like family" category. Lo was in town from California and we decided to make dinner, drink wine, eat chocolate and just chill.  She is one of the main reasons this space exists.  While chatting a year ago, she asked if I ever considered putting my recipes and thoughts into a blog.  The thought hadn't crossed my mind and I was honestly terrified of putting my thoughts out there.  She sent me this book and several months later after several brainstorming sessions with her and D the space was made.  So thank you Lo :)

In a previous post, I mentioned that pizza was my go-to meal for when friends are over, however, bibimbap is a close second.  The recipe was passed down from other friends who are like family, L and C.  At first I read the recipe that C sent and I was a bit nervous since there were so many steps.  However, there are a few time saving steps that I've acquired, and I've learned that you can throw just about any veggie into this bowl and it's delicious, so it's hard to screw up.  The one key ingredient you can't skip is the sauce.  C's recommendations include: "make sure to buy the Korean sounding sauce and a nice hoppy bomber." I used this Korean sauce and I agree, your favorite IPA is a fantastic pairing with this meal. 

C recommended using two separate recipes to make bibimbap: this recipe for the rice and this recipe for the rest.  You can include meat, tofu, or more veggies.  I recommend using two skillets simultaneously so that the prep goes faster and when the veggies are done put them in separate bowls for serving later.  Follow the recipe's instructions for final presentation. 


We enjoy this meal for it's simplicity, warm flavors and the heat which comes from the sauce.  If you prefer more heat, bring on the sauce! Once you've put the bowl together, break the egg yolk and mix it in with the sauce and goodies.  Playing with your food is encouraged!

Saturday, November 8, 2014

Speeding Up and Slowing Down

You know that feeling you get that life is moving at a much faster pace than when you were a child? Friends and I often say "Where did the month of (insert month here) go?" It's mind-boggling and crazy to think that our lives can get into such a routine that entire days/months/years fly by.  I know I'm not alone since it's been written about here and here. While it's not a science, it's all about perception, and for me the months of September and October happened so quickly I can barely believe it's November.  

Last time I wrote, I mentioned that I was traveling for work and D was interviewing at way too many places for his fellowship.  Well that ended finally (!!!) and while I'm thankful for the opportunity to travel to all corners of the U.S. I don't ever want to do it again…ever. To be exact, in the past six weeks I've traveled to 11 cities: New York, Salt Lake City, Phoenix, Denver, Atlanta, Philadelphia, Nashville, Los Angeles, Washington DC, Minneapolis and Dallas. Even when I read over that sentence I still can't believe it.  Who does that?  While most of it was work-related, a few of the trips were with D to scope out cities he was interviewing in. Did I mention he also interviewed at 15 places and traveled for 85% of them? He went to California 3 TIMES. Ok, enough. It helps me to put into words the sheer craziness that ensued in our home. 

I tell you all of this because during these past few months there was not much time for cooking.  I ate out, a lot. During all of that travel, D and I had an unexpected weekend in Chicago after our flights were cancelled to Cleveland.  We soaked up the weekend by checking out a few new restaurants, biking around our neighborhood, going to Oktoberfest, and visiting our local farmers market. Heaven. On. Earth. It was the end of September and the leaves were starting to turn and the market was bright and bursting with beautiful produce.  I saw some behemoth zucchini and knew one of them had to be mine.


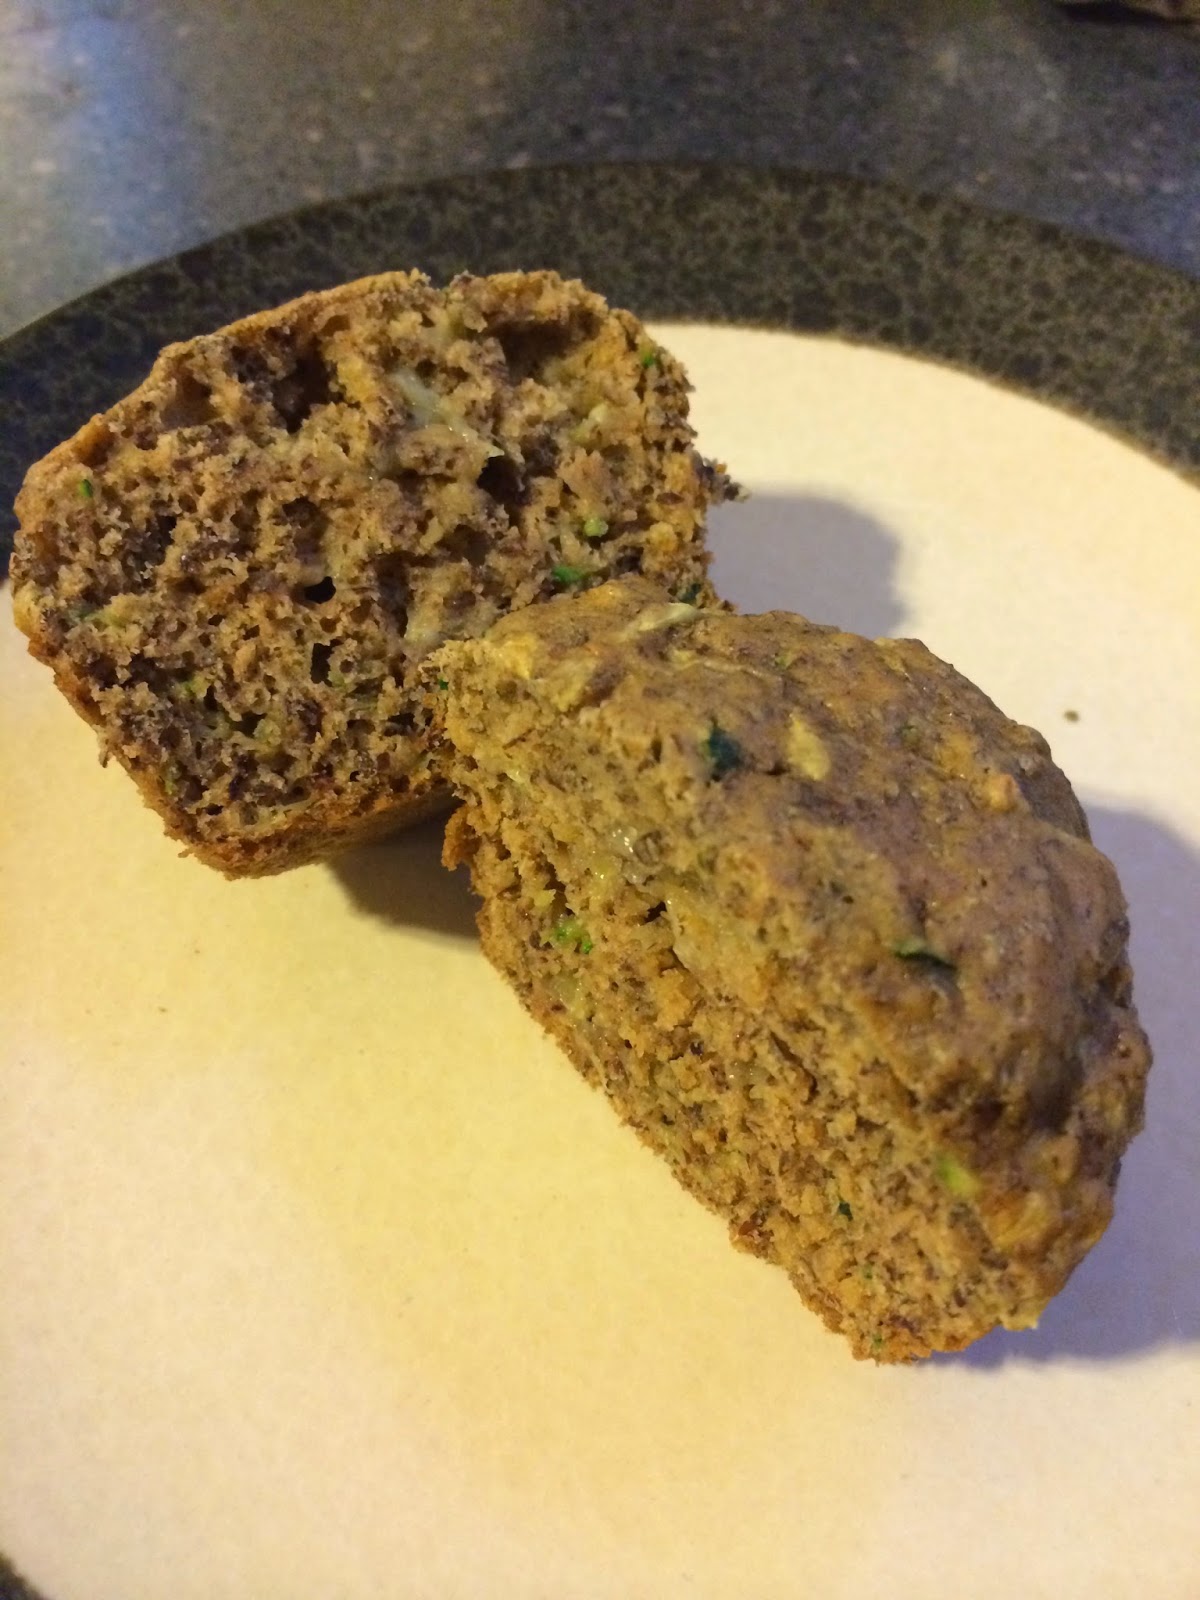
Zucchini is one of those miraculous vegetables which can be eaten as a savory side, mixed with pasta, or baked into deliciousness.  I decided to go with the latter and found a recipe for Zucchini, Banana and Flax Seed Muffins.   These muffins are not too sweet and are very soft and light.  They are the perfect accompaniment to start out your morning with a cup of tea or coffee.  

Zucchini, Banana and Flax Seed Muffins (adapted from Martha Stewart)
Butter/Nonstick cooking spray
1 3/4 cups all-purpose flour (spooned and leveled)
1/2 cup ground flaxseed
3/4 cup brown sugar (Martha recommended 1 cup but I prefer mine lightly sweetened)
2 teaspoons baking powder
1/2 teaspoon coarse salt (kosher is good)
1 teaspoon ground cinnamon
1 1/2 cups coarsely grated zucchini
1/3 cup mashed ripe banana (from 1 large banana)
1 large egg, lightly beaten
1 teaspoon pure vanilla extract

Grate the zucchini first and allow it to drain in a colander with paper towel for 15 minutes or so. Also note the other farmers market jewels below :)


While the zucchini works it's magic, preheat your oven to 350 degrees and lightly coat 12 standard muffing cups with butter or cooking spray. In a large bowl, whisk together flour, flaxseed, brown sugar, baking soda, baking powder, salt and cinnamon.  


Add zucchini and banana to the dry mixture and stir to combine.  In a small bowl, stir together the milk, egg and vanilla.  Then, add the milk mixture into the flour mixture and stir to combine (do not over mix). 

Divide the batter among the muffin cups using a 1/4 cup for measurement.  Batter should be slightly below the rim of each cup. Bake for 20 to 25 minutes or until a toothpick comes out clean.  Let the muffins cool on a wire rack for 15 minutes before eating.


Store the muffins for up to 2 days in an air tight container.  You can warm them each morning in your microwave or oven and slather them with butter.  These muffins freeze well too so you can save them for mornings when you're feeling hazy and still hungover from sleep. Simply defrost and reheat them in the oven so they come out warm and crispy.