Monday, February 23, 2015

I see you, Winter

Winter has finally decided to show up in Chicago, which means chilly days and sub-zero windchill. The pretty blanket of white snow has turned into mountains of black, sharp and dangerous ice. We are still digging/chopping snow to find a place for our car and it's not uncommon to hear tires spinning and people screaming in agony as they try to shove their cars in and out of parking spots. February is usually the month where I find myself questioning why on earth people, like myself, choose to live under such conditions.  Luckily, with a move to a warmer place on the horizon (come on, June!), this winter has been a season of lasts for us and we are oh so excited.  In the meantime, we continue to celebrate the small victories like, "The sun is out!" or "It's still light at 5:30pm!"  

While it might be cold outside, my kitchen this time of year is usually toasty. I use the oven more in the winter to roast, bake or reheat leftovers. My favorite and most simple recipes involve roasting vegetables into oblivion and root vegetables, in particular, are even better the longer you roast them. When it comes to anything vegetable related, I always turn to Yotam Ottolenghi's cookbooks for recipes. I love his writing (he's hilarious) and also the fact that he pairs beautiful vegetables with loud spices and flavors. His cookbook, Plenty, is a staple in my kitchen and I highly recommend adding it to yours, whether you are a vegetarian or not. He moves vegetables from what would normally be considered a side dish to the main course. I first learned about Plenty from my best friend, and we made many a dish together from this cookbook before she moved to Denver a few years ago. One year for Christmas, it arrived on my doorstep from her and I couldn't have been more excited. We both continue to cook from it and send each other pictures of the meals we each have made so we can dog ear recipes to try in the future. One of my personal favorites is the Sweet Potato Cakes.  I'm going to post that recipe sometime very soon. Many of Ottolenghi's recipes involve a long list of ingredients, which can scare people away, but if you look closely a lot of the ingredients are spices and require little effort. For example, before I opened his cookbook, I hadn't heard of harissa, but it is worth the purchase at your local specialty foods store.  

I enjoy making most of his recipes on Sunday afternoons/evenings when I have the time to chop, peel, roast, bake, or what have you. Yesterday was cold and sunny (!!!) so while D was walking Parker, I opened up this cookbook to find inspiration.  I stumbled upon this recipe because of the title, "The Ultimate Winter Couscous," which appeared to be screaming at me when I read it.  For Yotam to be using the word "ultimate" in a recipe, I figured it must be damn good.  After a boozy brunch at Lula Cafe, we stopped at Stanley's Fruit and Vegetables, Chicago's best kept secret for fresh and reasonable produce.  Chicagoans, you must go here if you haven't been yet. But shhhh, you must also keep it a secret before all of Chicago starts to shop there. I usually come home with 3-4 bags of produce each week and it never costs more than $25. One time, I bought 8 lbs of strawberries for $1.99. We had smoothies coming out of our ears. 


When we got home from Stanley's, I proceeded to peel, cut and chop the root veggies and squash, put them into a dutch oven and then watch the Red Carpet at the Oscar's while it roasted and delicious scents started to waft out of the oven. After the vegetables did their thing, I made the couscous and sauteed chicken. You could add any protein you like, or leave it as is. The vegetables are cooked to the point where they still crunch and the spices (paprika, ginger, turmeric, cinnamon, anise, bay leaves, chili flakes) give just enough heat. I bought cilantro and forgot to add it in the end.  It didn't need it, but I would add it just to give the meal even more dimension. This meal is going to become a staple in our house, I can just tell.  We gobbled it up and shortly after watched Lady Gaga's Sound of Music tribute at the Oscar's.  Check out her performance if you missed it, while eating The Ultimate Winter Couscous.  Oh, and buy Plenty! You won't be sorry.

The Ultimate Winter Couscous
From Plenty, by Yotam Ottolenghi
 

2 medium carrots, peeled and cut into 3/4" chunks
2 medium parsnips, peeled and cut into 3/4" chunks
8 shallots, peeled
2 cinnamon sticks
4 star anise
3 bay leaves
5 Tablespoons olive oil
salt
1/2 teaspoons ground ginger
1/4 teaspoons ground turmeric
1/4 teaspoons hot paprika
1/4 teaspoons chili flakes
2 1/2 cups cubed butternut squash
1/2 cups dried apricots, roughly chopped
1 can chickpeas
1 1/2 cups chickpea liquid or water
1 cups couscous
large pinch saffron
1 cup boiling vegetable stock
3 Tablespoons butter, broken into pieces
2 Tablespoons harissa paste
1 oz preserved lemon, finely chopped
2 cups cilantro leaves


Preheat oven to 375 degrees. Place carrots, parsnips, shallots, cinnamon sticks, star anise, bay leaves, 4 T olive oil, 3/4 t salt and all other spices in a large oven proof dish. Mix well and cook for 15 minutes.


Stir in the butternut squash and cook for 35 minutes. Add the apricots, chickpeas and their liquid. Cook for 10 more minutes.

About 15 minutes before the vegetables are done, place the couscous in a heatproof bowl with the remaining 1 T olive oil, saffron and 1/2 t salt. Pour the boiling stock over the couscous and cover the bowl tightly with plastic wrap. Let sit for 10 minutes until all the stock has been absorbed. Fluff and stir in butter with a fork until melted. Cover to keep warm.

Remove the vegetables from the oven and stir in the harissa and preserved lemon. Taste and add more salt if you like.

To serve, spoon couscous into individual bowls, top with vegetables and sprinkle with plenty of cilantro leaves.


Sunday, February 8, 2015

New Year, New You

Happy New Year!  I realize that it's February and we are way past the stage of saying Happy New Year, but this is my first post in awhile. This year has been good to me thus far.  I turned 30 recently and had one hell of a celebration.  I love birthdays more than most people and so the celebration turned into a several week affair.  We celebrated at the Signature Room (bucket list, check!) on the 95th floor of the John Hancock building with my parents, and the following weekend D and my sister threw a cooking inspired surprise party which ended with an epic dance party at one of our favorite bars.  I've been told by news sources that my birthday is technically the "most depressing day of the year" due to the freezing climate, lack of sunlight and the fact that it's a month after the holidays.  Even in the bitter cold of winter as I trudge up and down Wacker Drive, cursing at the wind and snow, I am thankful for a winter birthday to remind me of all those who I love and am thankful for. 

Now as I move past the birthday celebration afterglow, I plan to hibernate my way through winter by continuing to write, cook, check things off my Chicago bucket list, and make more time for new adventures. Recently, a friend and I signed up for a Zumba class (we're the youngest ladies in the class by 20 years) and I'm having more fun than I imagined.  I learned that I'm wayyyy more uncoordinated than I thought and that it's ok to feel awkward in my own body. Also, a coworker, who happens to be an amazing yoga instructor, has started teaching a yoga class at work during lunch and it's a nice break in the middle of my week.  I've almost (!!!) conquered the "crow" position thanks to her and Lo.  New Year, New You, right?

Speaking of trying new things, I've been cooking more simple meals throughout the week to leave more time for reading, watching shows like Downton Abbey, and spending QT with D and Parker.  At first I sort of felt like a cop-out for making such simple meals like quesadillas or fish sticks and corn, but now I feel like my nights are more full, in fact.  I wouldn't say that this was a new year's resolution, instead it's more a pleasant surprise and the result of shifting interests.  Enter another quick meal: One-Pan Pasta. Who knew that you could boil all your pasta ingredients in one pan and that the water/broth turns into a delicious sauce?  Magic!  In talking with friends, I learned that I am late to the game on this one. Well I'm sure glad I found out about this magic. Better late than never, right? 


One-Pan Pasta (from Lottie + Doof via Martha Stewart Living)
12 ounces spaghetti or linguine 
12 ounces cheery tomatoes, halved
1 onion, thinly sliced
6 garlic cloves, sliced
1/2 teaspoon red pepper chili flakes
2 sprigs basil
2-3 tablespoons olive oil
2 teaspoons kosher salt
1/4 teaspoon ground pepper
4 1/2 cups water (or chicken stock)
Plenty of freshly grated parmesan cheese for serving


Combine pasta, tomatoes, onion, garlic, red-pepper flakes, basil, oil, kosher salt, pepper, and water in a large skillet. Bring to a boil over high heat. Boil mixture, stirring and turning pasta frequently with tongs, until pasta is al dente and water has nearly evaporated, about 10-12 minutes.


Season to taste with salt and pepper, divide among bowls, and garnish with basil. Serve with oil and parmesan.


Sunday, November 30, 2014

Friends Make the World Go Round

With Thanksgiving in the rearview mirror, I've spent the last few days reflecting on those things I'm thankful for: good health, family, friends, and corgis. I have family a mere 90 miles away and friends who are more like family that are a phone call or quick plane ride away.  I'm thankful for a loving and supportive spouse who has taught me to live spontaneously and not stress over things that are out of our control.   One of those things is his upcoming fellowship match.  In a few short days, D and I find out where he matched for his cardiology fellowship.  We have our wish list, of course, but in reality we would be happy in any of the fifteen (!!!) places on the list.  As the date approaches, I try to think about what it will be like on the other side, after we find out where we're moving to for the next 3-5 years.  I appreciate the calm before the storm and am trying to soak in this time.  This holiday at home was the perfect escape for me and I slept better and longer than I have in a long time.  Isn't it great how being home can do that? Life seems to slow down in a way that doesn't seem possible in Chicago.  I revert back into my old ways of wearing PJs for most of the day, having spontaneous dance parties with my sister, drinking New Glarus while watching movies and taking long walks with Parker along Lake Michigan.  Time with family is my reset button. 

Last week, before the holiday, I had the chance to see one of those people who falls into the "friends who are more like family" category. Lo was in town from California and we decided to make dinner, drink wine, eat chocolate and just chill.  She is one of the main reasons this space exists.  While chatting a year ago, she asked if I ever considered putting my recipes and thoughts into a blog.  The thought hadn't crossed my mind and I was honestly terrified of putting my thoughts out there.  She sent me this book and several months later after several brainstorming sessions with her and D the space was made.  So thank you Lo :)

In a previous post, I mentioned that pizza was my go-to meal for when friends are over, however, bibimbap is a close second.  The recipe was passed down from other friends who are like family, L and C.  At first I read the recipe that C sent and I was a bit nervous since there were so many steps.  However, there are a few time saving steps that I've acquired, and I've learned that you can throw just about any veggie into this bowl and it's delicious, so it's hard to screw up.  The one key ingredient you can't skip is the sauce.  C's recommendations include: "make sure to buy the Korean sounding sauce and a nice hoppy bomber." I used this Korean sauce and I agree, your favorite IPA is a fantastic pairing with this meal. 

C recommended using two separate recipes to make bibimbap: this recipe for the rice and this recipe for the rest.  You can include meat, tofu, or more veggies.  I recommend using two skillets simultaneously so that the prep goes faster and when the veggies are done put them in separate bowls for serving later.  Follow the recipe's instructions for final presentation. 


We enjoy this meal for it's simplicity, warm flavors and the heat which comes from the sauce.  If you prefer more heat, bring on the sauce! Once you've put the bowl together, break the egg yolk and mix it in with the sauce and goodies.  Playing with your food is encouraged!

Saturday, November 8, 2014

Speeding Up and Slowing Down

You know that feeling you get that life is moving at a much faster pace than when you were a child? Friends and I often say "Where did the month of (insert month here) go?" It's mind-boggling and crazy to think that our lives can get into such a routine that entire days/months/years fly by.  I know I'm not alone since it's been written about here and here. While it's not a science, it's all about perception, and for me the months of September and October happened so quickly I can barely believe it's November.  

Last time I wrote, I mentioned that I was traveling for work and D was interviewing at way too many places for his fellowship.  Well that ended finally (!!!) and while I'm thankful for the opportunity to travel to all corners of the U.S. I don't ever want to do it again…ever. To be exact, in the past six weeks I've traveled to 11 cities: New York, Salt Lake City, Phoenix, Denver, Atlanta, Philadelphia, Nashville, Los Angeles, Washington DC, Minneapolis and Dallas. Even when I read over that sentence I still can't believe it.  Who does that?  While most of it was work-related, a few of the trips were with D to scope out cities he was interviewing in. Did I mention he also interviewed at 15 places and traveled for 85% of them? He went to California 3 TIMES. Ok, enough. It helps me to put into words the sheer craziness that ensued in our home. 

I tell you all of this because during these past few months there was not much time for cooking.  I ate out, a lot. During all of that travel, D and I had an unexpected weekend in Chicago after our flights were cancelled to Cleveland.  We soaked up the weekend by checking out a few new restaurants, biking around our neighborhood, going to Oktoberfest, and visiting our local farmers market. Heaven. On. Earth. It was the end of September and the leaves were starting to turn and the market was bright and bursting with beautiful produce.  I saw some behemoth zucchini and knew one of them had to be mine.


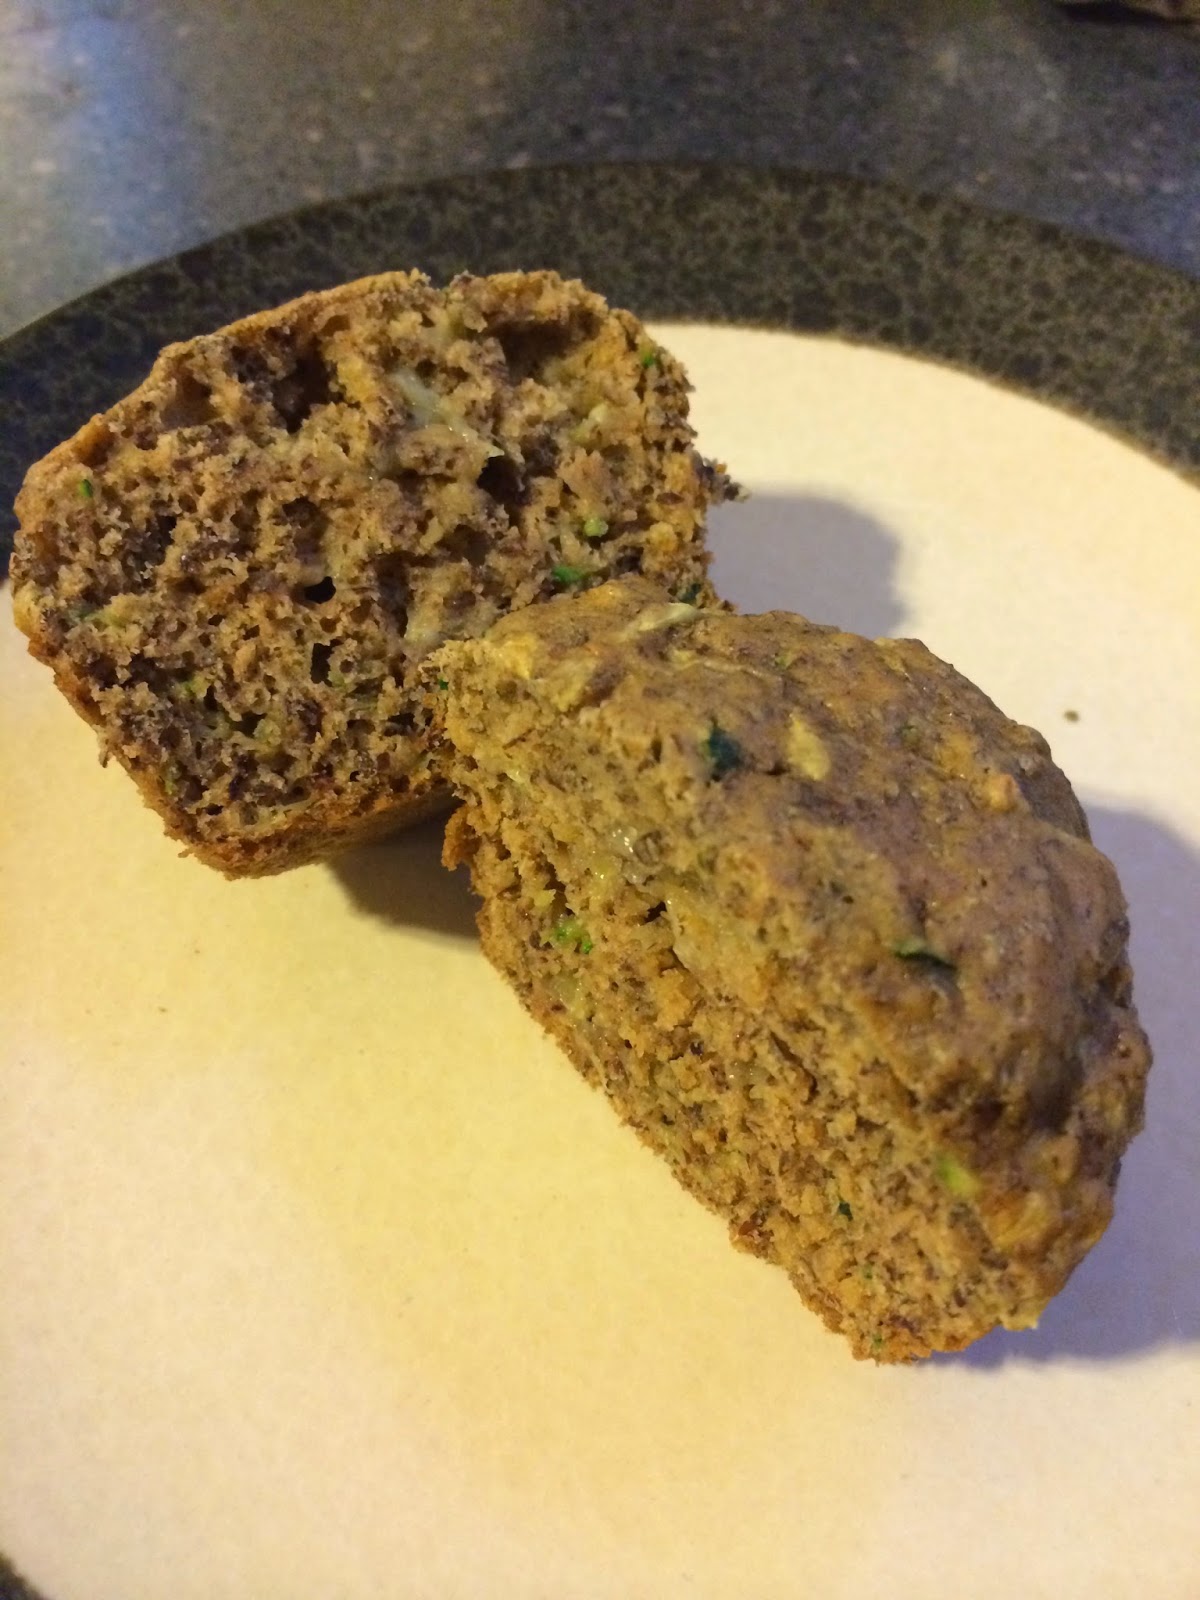
Zucchini is one of those miraculous vegetables which can be eaten as a savory side, mixed with pasta, or baked into deliciousness.  I decided to go with the latter and found a recipe for Zucchini, Banana and Flax Seed Muffins.   These muffins are not too sweet and are very soft and light.  They are the perfect accompaniment to start out your morning with a cup of tea or coffee.  

Zucchini, Banana and Flax Seed Muffins (adapted from Martha Stewart)
Butter/Nonstick cooking spray
1 3/4 cups all-purpose flour (spooned and leveled)
1/2 cup ground flaxseed
3/4 cup brown sugar (Martha recommended 1 cup but I prefer mine lightly sweetened)
2 teaspoons baking powder
1/2 teaspoon coarse salt (kosher is good)
1 teaspoon ground cinnamon
1 1/2 cups coarsely grated zucchini
1/3 cup mashed ripe banana (from 1 large banana)
1 large egg, lightly beaten
1 teaspoon pure vanilla extract

Grate the zucchini first and allow it to drain in a colander with paper towel for 15 minutes or so. Also note the other farmers market jewels below :)


While the zucchini works it's magic, preheat your oven to 350 degrees and lightly coat 12 standard muffing cups with butter or cooking spray. In a large bowl, whisk together flour, flaxseed, brown sugar, baking soda, baking powder, salt and cinnamon.  


Add zucchini and banana to the dry mixture and stir to combine.  In a small bowl, stir together the milk, egg and vanilla.  Then, add the milk mixture into the flour mixture and stir to combine (do not over mix). 

Divide the batter among the muffin cups using a 1/4 cup for measurement.  Batter should be slightly below the rim of each cup. Bake for 20 to 25 minutes or until a toothpick comes out clean.  Let the muffins cool on a wire rack for 15 minutes before eating.


Store the muffins for up to 2 days in an air tight container.  You can warm them each morning in your microwave or oven and slather them with butter.  These muffins freeze well too so you can save them for mornings when you're feeling hazy and still hungover from sleep. Simply defrost and reheat them in the oven so they come out warm and crispy.  


Tuesday, September 23, 2014

The Little Things

The phrase “life-changing” means different things depending on who you talk to.  I can honestly say I do not use the phrase lightly. This pizza dough recipe has, in fact, been life-changing.  Other aspects of my days which fall into this “life-changing” category are: coffee, sock buns, and the Americas Test Kitchen podcast.  These things all help me get by on a day-to-day basis and amongst the maze of life, they provide a foundation. These days have been pretty nuts in our household as I'm traveling for work and a certain someone is interviewing at 13423970274 places for a medicine fellowship position. I rely heavily on to these life-changing things to get by.

As anyone who's eaten in my kitchen knows, I have a strong love for homemade pizza and when someone asks what my signature dish is, I usually reply with pizza.  I used to buy Trader Joe’s pre-made dough but after several sticky situations full of cursing and flour, I no longer use it.  Whole Foods has a pretty spectacular multi-grain dough that you can buy from their pizza counter but since we live too far from one, this is not a reliable option.  For awhile, I gave up on making pizzas for the above reasons, but low and behold one day my scrolling through food blogs paid off and I found this GEM!  It takes a few minutes to throw together and after rising for an hour, it’s ready!

After the first time I made it, I thought about the pizza for days.  It’s really that good.  I realized that the pre-made dough I previously used was dense and tasteless.  This new homemade dough is slightly sweet and feathery.  When baked at a whopping 500 degrees, the edges are crispy and tan, crackling with each bite.  The longer you let the dough rise, the yeast continues to work it’s magic, creating pockets of trapped air aka deliciousness.  This recipe makes two pizza rounds or one large pizza, you choose. You can top it with whatever goodies you wish and if using pizza sauce, I recommend using a minimal amount so the dough doesn’t get soggy.  Cheers, to life-changing pizza dough!


Life-Changing Pizza Dough (from The Wednesday Chef)
3 1/2 cups (1 lb) all-purpose flour
1 1/2 to 2 teaspoons fine sea salt
1 packet (1 ½ teaspoons) active dry yeast
1 1/2 teaspoons raw or regular sugar
2 tablespoons olive oil
1 1/4 cups lukewarm water


1. Put the flour into a large bowl and make a well in the middle. In a large measuring cup, mix the yeast, sugar and olive oil into the water and leave for a few minutes, then pour into the well. 


2. Using a fork, bring the flour in gradually from the sides and swirl it into the liquid. Sprinkle in the salt. Keep mixing, drawing larger amounts of flour in, and when it all starts to come together, work the rest of the flour in with your clean, flour-dusted hands. Knead until you have a smooth, springy dough.


3. Wash out your bowl, dry it and oil it lightly. Place the ball of dough in the bowl and turn to coat it with oil. Cover the bowl with a damp cloth and place in a warm room or an oven (not turned on) for about an hour. The dough will have doubled in size.


4. Now put the dough on a flour-dusted surface and gently deflate it with your hands - this is called punching down the dough. You can either use it immediately, or keep it, wrapped in plastic wrap, in the fridge (or freezer) until required. If using right away, simply pat out to the size of your half-sheet pan or divide in half and roll out to cover two pans. You can also divide the dough into little balls for individual  pizzas - this amount of dough is enough to make about three to four medium pizzas.


5. Timing-wise, it's a good idea to roll the pizzas out about 15 to 20 minutes before you want to cook them. Then, simply top your pizza rounds with your heart's desire and bake them in a very hot, preheated oven. 
I recommend 500 degrees, or higher!  Bake for about 10 minutes for the thicker pizza and less for the thinner ones, until crisp and bubbling.

Monday, August 18, 2014

Spelunking through Summer

We just got back from spending a week in Michigan and it was incredible.  This vacation was much needed and the perfect way to experience summer during my favorite month of August.  We packed a lot into our vacation but it was the perfect amount. We saw 43 (!) family members at an annual family reunion and then drove up Michigan's west coast to spend the rest of the week at an adorable cottage and then camped near Sleeping Bear Dunes.  Most of our days included some combination of hiking, swimming, sprinting down sand dunes and climbing, very slowly, back up, eating s'mores, and drinking local brews.  One afternoon we visited a local winery which specializes in sparkling wines.  In the end, we bought a bottle and are hoping it survived a few hot nights in the car so we can drink it soon.  My favorite part about our trips to northwest Michigan is the fact that you do not feel like you're in the Midwest, and I mean that in best way possible.  The water is crystal clear (unlike Chicago), there are forests of pine trees and ferns, and sunsets like this exist:


If you have the chance to experience this part of the country, I highly recommend it. You won't be disappointed.  On our drive back home, D and I were talking about the summer dinners we had on our vacation and what other meals we should take advantage of during this time of year.  He reminded me that I have a killer recipe for black bean burgers and I decided I must share it here.


These burgers are easy to make which is great for my less-cooking-more-time-outside strategy this summer. Also, my meat-loving friends have tried them and are sold! Feel free to play around with the fresh herbs and spices.  For all of you out there that believe cilantro is the devil, you could take out the cilantro and substitute parsley instead.  You'll need a food processor/blender and a 10-inch non-stick skillet.  


Black Bean Burgers

1/4 cup red onion, roughly chopped
2 cloves of garlic
2 (15-ounce) cans of black beans, rinsed
2 tablespoons of cilantro, chopped
1 egg
1 teaspoon cumin
1/2 teaspoon red pepper flakes
1/2 cup breadcrumbs
Salt and black pepper to taste

In a food processor, pulse the red onion, garlic, 1 can of black beans, cilantro, cumin and red pepper flakes together. Taste and add salt and pepper to your liking. Add egg and pulse to combine.


Transfer mixture to a large mixing bowl and add the second can of black beans and bread crumbs.  Using a spatula, stir to combine the ingredients.  If the mixture is still too wet to form into patties, add a small spoonful of breadcrumbs.


Divide black bean mixture into 6 patties, roughly 1/2 of a cup each.  Heat 10-inch non-stick pan over medium-high heat with 1 tablespoon of olive oil until the oil sizzles (if the oil is smoking it's too hot!).  


Turn down the heat to medium-low and place 3-4 burgers on the pan and cook for about 5 minutes per side or until burgers are light brown and heated all the way through. Meanwhile, you can toast hamburger buns, cut tomatoes, avocado, lettuce or whatever fixings you would like to add. I used arugula, avocado, and roma tomatoes.  Place warm burger on bun and top with fixings. Enjoy! 


Wednesday, July 30, 2014

Summer Nights

This summer I’m trying to soak up every minute of sun, which leaves little time for cooking at the end of the day.  Weekends have been full of either work or play, and while I certainly can’t complain, I do feel farther away from the kitchen during the summer months.  Luckily, the produce this time of year is insane and this abundance of flavor helps pull together quick meals and snacks.  We’ve been eating a lot of tomato/basil/mozzarella sandwiches, grilled salmon burgers, and shrimp tacos around here (more on those later).  On nights when we're both home you can find us on our back porch while our dog, Parker, roams around chasing lightning bugs.  I live for nights like this where the air feels like bathwater, cicadas play their tune, and you look up and see a couple of stars (!!!) in the Chicago sky.  Life. Is. Good.


While I have my go-to meals for summer nights, I just discovered a simple kale and quinoa salad that has officially been added to my repertoire.  I’ve had my eye on it for quite some time.  For whatever reason I had an aversion to kale salads since when served raw, this leafy green is quite bitter.  I am a pro at putting kale on pizza, in a frittata, or sauteed and served in pasta.  But a salad was something I have been hesitant to try.  Every time I wander through the farmers market, I tend to buy kale from the same vendor.  So this time around, I bought it with the intention of conquering my fear of kale salads.  The hardest part of preparing this salad is cutting the kale into skinny ribbons, and let’s be honest, that’s not “hard” at all. The salad, when mixed with a mustard vinaigrette, is the perfect combination with whatever protein you choose or it could be served the next day with avocado for lunch.  One of the best things about kale salads: the refrigerator shelf life is WAY longer than a spinach, mixed greens, or arugula salad. Score! 


Kale and Quinoa Salad (adapted from Smitten Kitchen)
Salad
1/2 cup uncooked quinoa (or 1 1/2 cups cooked)
8 ounces kale (I used Premier kale, but any kind will do)
1/2 cup almonds, coarsely chopped, very well toasted and cooled
1/3 cup fresh figs, chopped a bit
2 to 3 scallions, thinly sliced
¼ cup freshly grated Parmesan
Few gratings of fresh lemon zest
Dressing
3 tablespoons olive oil
1 1/2 tablespoons white wine vinegar
2 teaspoons coarse Dijon mustard
Just shy of 1 teaspoon honey
Salt and freshly ground black pepper to taste


Rinse quinoa well in a small colander. This is essential to remove bitterness. Place quinoa and 1 1/2 cups water in a small saucepan and bring to a simmer with a couple pinches of salt. Simmer at a very low temperature for 15 to 20 minutes, until tender. Drain any un-absorbed liquid from cooked quinoa. Spread quinoa on a plate to cool quickly.
Wash your kale and dry it well. Then, with a knife, remove the rib from each stalk, leaving long strips of kale leaves. Stack the leaves in small batches, roll them tightly the long way, and cut the roll crosswise into thin ribbons. Add the kale ribbons to a large salad bowl. Add remaining salad ingredients to kale and toss to mix.
Whisk dressing ingredients together in a small dish, and pour the dressing over the salad. Season with salt and pepper to taste, then dig in.